Tuesday, January 31, 2012

60 Degrees and Sunny

Wow - what a beautiful day outside!!  I can't believe it's only January 31st!! 

I don't know about you, but I'm soooo ready to ditch my heavy sweaters and slip into some spring fashion.  The weather plus all the new catalogs arriving at my house with their fresh, vibrant colors have really been teasing me lately...so I thought I'd share with you some of the the spring styles that are currently "in my cart"!  (Now if only money grew on trees...)

How gorgeous is this coral blouse...
Silk pintuck blouse
Silk Pintuck Blouse

I actually bought this polka dot top in the fall (on sale!), but it's back in J.Crew's spring collection!  It's a favorite in my closet... 
Natasha top in polka dot

This looks like the perfect lightweight sweater...with lace!
Merino tatted lace sweater

I normally don't wear short sleeved blouses...but I just love the scalloped sleeves on this one! 
Scallop short-sleeve shirt
Scalloped short sleeve shirt

Confession: I bought a pair of these jeans over Christmas and cannot wait for their "coming out party"!!
Toothpick jean in garment-dyed twill
Toothpick jean in Neon Persimmon

Wow, these are really awesome pants!
Citizen of Humanity Floral Thomson

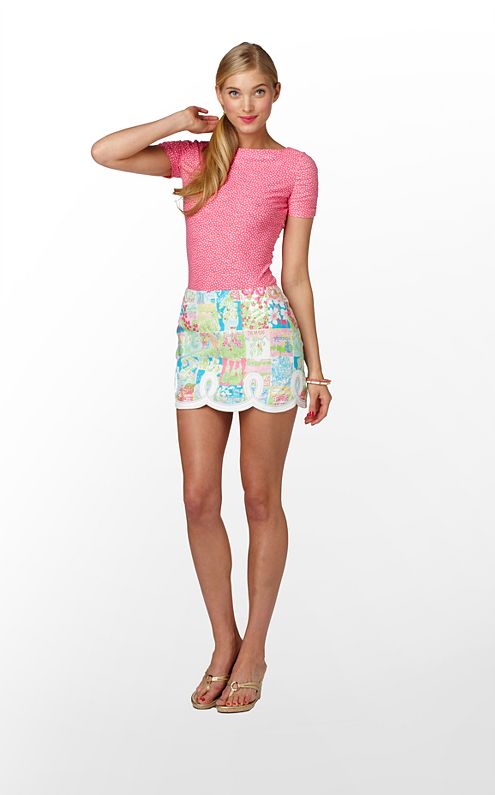
I adore the new Spring 2012 prints by Lilly Pulitzer, especially this one...and I can't get enough of the scalloped hemline on this skirt!
Tate Skirt
Lilly Pulitzer Tate Skirt
 A beautiful and simple backless lace dress from Urban Outfitters!
Pins and Needles Backless Lace Dress

Can't forget shoes!  I'm purging most of my old, beat-up sandals and these would be the perfect new addition to my closet...
Jack Rogers Pauline Stitch

I linked to these a few weeks ago...and I still love:
Tory Burch 'Clines' Ballet Flat

I'm curious, have you already you started spring browsing shopping?  Anything in particular catching your eye?! 

xoxo

Monday, January 30, 2012

Pinhole Press

If you're like me and can't get enough of personalized photo gifts, I highly recommend checking out Pinhole Press


They have beautiful, simple photo products--like cards, books, framed prints, notepads, even brag books for proud parents/ grandparents (what a cool concept!) and write-your-own baby storybooks (love!).   You personalize them with your favorite photos (vacations, wedding, baby, family, etc.), and it's really easy to do. The finished products are gorgeous with the most beautiful silky paper. 

I actually first read about Pinhole last March on A Cup of Jo.  They sounded great, but I'd been using Shutterfly for well, ever, and it was working out just fine! 

Then, when it came time to make our "parents' albums" in the Fall (we gave them as Christmas presents!), I found myself looking for a higher quality album to showcase the beautiful wedding pictures we had just spent a small fortune on...and remembered Pinhole!!  

Since then, I've made our Christmas card, two 2012 calendars, and am currently working on a honeymoon album all on Pinhole!  I seriously can't get enough! 

Anyways, here are some of the adorable products Pinhole is advertising for Valentine's day:


Sunday, January 29, 2012

Friday, January 27, 2012

Have a great weekend!


What are you up to this weekend, friends?  We actually have nothing planned - no traveling, no parties, no house guests - just a good old fashioned Nate and Kait weekend in Ocean City!  I think tomorrow we'll bundle up and spend the afternoon on the beach with some magazines...and maybe a bottle of white wine!  I'd also love to sit down a pick out the pictures for our wedding album...and the songs for our wedding video.  (I don't know why I have been such a procrastinator - we could have the finished products by now if we had done this 5 months ago!)

Anyways, a few fun links (and videos) from around the web:

This movie trailer makes me think of my mom <3 I can't wait to see it with my sisters (and my Dad - I know he'll want to come with!)

Pennsbury High School's senior prom, at the high school my brother graduated from, was named the Best in America by Reader's Digest! (I'm honored to say I went to two of these!)

Beautiful business cards

The ever so stylish (and adorably in love) Garance Dore and The Sartorialist shot this video to capture “What Makes True Love” for Tiffany’s

How to throw yourself a pity party

Have a great one!  xoxo

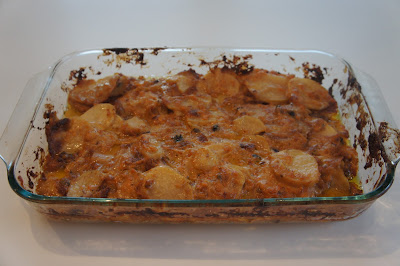
Recipe: Scalloped Potatoes


I'm working from home today and woke up a little early to start making dinner.  That's right, I said dinner!

I have been daydreaming about making these scalloped potatoes ever since we had them on New Years Eve.  (So much so, that I begged my friend Kelly to get me the recipe!)  They take all day to cook...but the recipe is super easy and its SOO worth the wait!  You can't screw it up!

All you mushroom haters out there - the recipe calls for cream of mushroom soup but I promise you won't even know its in there when its all said and done! I am a verrrrrry picky eater and HATE mushrooms, but these potatoes are to die for!  Crispy, cheesy and delicious!

I'll post a picture tonight when they're ready (Update: see above!)!  Until then, here's the recipe!

Ingredients
  • 5lbs of all purpose idaho potatoes (peeled or not, your choice)
  • Margarine or butter
  • Pam
  • Cream of mushroom soup (1lg & 1 sm, or 4 reg cans)
  • 3 cups shredded cheddar
  • Milk (1 cup for soup mixture, and some reserve)
  • 1 lg onion (sliced thin)

Directions
1. Preheat oven to 250 to cook all day.   For short term cooking, preheat to 350.

2. Peel and / or cut potatoes into slices.  Cut onion into thin slices.


3. Spray your pan(s) with Pam. Then add 2 tablespoons of butter sliced to the bottom.


4. Open soup, put in bowl and add a cup of milk.  Mix together.


5. Place spoonfuls of soup mix on bottom of pan until completely covered. It's important to make sure you have enough liquid on the bottom - this helps brown when you stir up bottom to top during cooking.


6. Place layers of potatoes (overlapping) onion slices, salt, pepper, soup mixture, layer of shredded cheddar cheese, then repeat. Top off with soup mixture. 

Potatoes

Onions, salt and pepper

Soup mixture

Cheese!

7. Cover with tinfoil for all day cooking. Spray with Pam so it doesn't stick.

8. Put in oven all day at 250 temp.  Throughout the day, to thicken up mixture, stir up from bottom. If your potatoes dry, you can always add a little milk.

For short term cooking, cook at 350 @ 2 hrs without cover.  If you wish to brown (which I HIGHLY recommend), just place under broiler 15 minutes before serving and watch.

In the oven...
(mines on the top rack because our oven is awful...but middle rack should be fine)

Note: This makes two 13 x 9 pans. So cut recipe, depending on size.

Enjoy! xoxo

(Recipe from the kitchen of Aileen Kevane)

Update @5:00pm: Around 3:00pm this afternoon, my potatoes were a little runnier than I wanted.  I think I was too worried about not having enough liquid on the bottom and actually put too much.  Either that, or our oven is worse than I thought.  So, I uncovered and let cook at 350 for the past 2 hours.   The top is browning and the potatoes underneath are still moist and look delicious!  I plan to switch to broil about 10 minutes before we sit down to eat for a little extra crispyness!  Will post final picture tonight!

Update @6:pm: Just finished dinner and the potatoes were as good as I remembered!  Aileen was right, you really can't mess this recipe up!  Just watch them cook and adjust your heat and stirring method accordingly.  I'm already excited for leftovers...

Thursday, January 26, 2012

Bridesmaid Gift Ideas

I recently got an email (ok facebook message) from a dear old friend who has been following my blog.  (Thank you so much for reading, by the way! And for your email!)

Anyways, she's getting married (yay!) and was looking for some "don't break the bank" gift ideas (DIY or bought) to give her 10 bridesmaids in addition to their "big" present.  So, I thought I'd share some of my suggestions with all of you.

DIY Ideas
Idea #1 - Photo Coasters
A full tutorial is coming your way soon to teach you how to make these adorable photo coasters.  But the gist of it is: photos, tiles from Home Depot ($0.16 each), modge podge, and felt glides!  


Idea #2 - Paper Hearts
Remember the valentine's day gift I made yesterday?  Well how about using black and white photos of you and each bridesmaid for the hearts?  On the back, you could writing something like "this gift was made just for you using my favorite picture of us" and include the full photo(s).  The accent hearts could be your the color of your dresses with the bridesmaids name.


Idea #3 - Painted Wine/Champagne Glasses
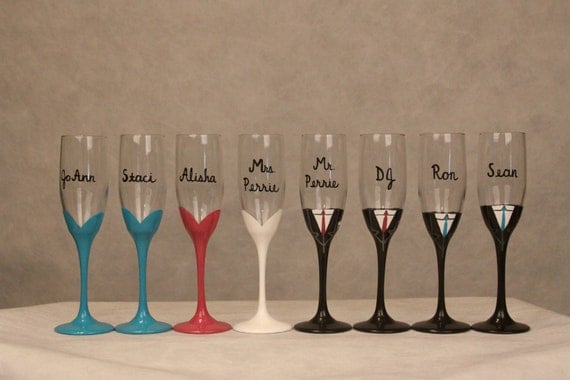
Although I haven't made these (yet!), painted dress wine glasses look fairly easy even for an amateur painter like me!  Give each girl two wine glasses: one with their name/bridesmaid dress and one with your name/wedding dress.  The girls could drink out of them while you're getting ready the morning of your wedding!

Set of 8 Bridal Party Champagne Flutes
Photo credit: ArtsyAsh101 shop on Etsy
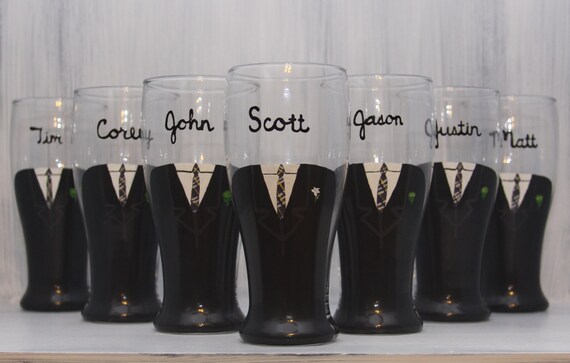
Added bonus...you can make beer ones for the guys!

Set of 5 Pilsner Glasses
Photo credit: ArtsyAsh101 shop on Etsy

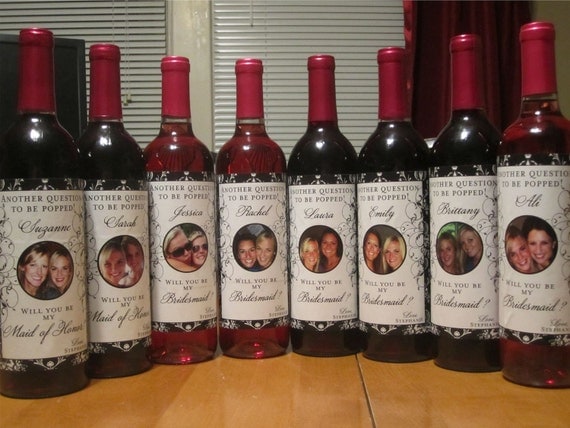
Idea #4 - Nice Bottle of Wine with a Custom Label
Everyone loves a good bottle of wine...and all you need to make your own wine bottle labels is powerpoint, full sheet shipping labels and a paper cutter!  Or, you can buy a design on Etsy and print them out on your own!  Could give this along with #2 or #3!

Bridal Party Gifts - Custom Wine Labels for each member of your Bridal Party
Photo credit: IDoArtsyWeddings shop on Etsy

Idea #5 - Artwork
Frame an enlarged photo (check out Michael's and AC Moore for their 50% off frame sales) or have a canvas made (there are groupons all the time) of a building / landscape from where you met or know each girl.  I know I would to have a picture of JMU's quad hanging in my house and I think that would make a great gift!  Write a cute message on the back of the frame with a sparkly gold pen so she'll always remember it was from you!

Photo credit: Zazzle

Gifts to Buy

Idea #6 - Monogrammed Button Down Shirts
A week before my wedding, I realized that I hadn't even thought about what I (or my bridesmaids) should wear the morning of the wedding while getting ready! Such an important part of the day!  So many pictures!! 

Luckily, my girls pulled through and we picked up matching silk robes! (And I loved all the pictures of us wearing them!)


But I would have loved to have given them something monogrammed or personalized to wear like these adorable button down shirts.  H&M, Old Navy, and Target all sell affordable basics...and you can look on Craigslist for a local seamstress who does monogramming!

Photo credit: The Southern Aisle

Idea #7 - Garment / Tote Bags
My sister-in-law, Casey, gave her bridesmaids colorful garment bags with their names on them! 
Photo credit: PattyBzz shop on Etusy
Or you could do a pretty tote bag?

Custom Boat and Tote Bag
Photo credit: L.L.Bean

Idea #8 - Bridal Party Hanger
My other sister-in-law, Sara, gave me a personalized hanger that said Mrs. Torok as an engagement gift...and I have since given this gift to my engaged girlfriends! I think it would be equally as cute to give one to all the girls in your bridal party!    
 
Photo credit: Rockabuycreations shop on Etsy

Gag Gift Ideas
Idea #9 - Custom T-Shirts
Urban Outfitter's has a custom tee shop where you can design individual t-shirts to literally say anything!  You can use Urban graphic or upload your own.  Could be cute for a bachelorette party, too!

Custom Shoppe
Photo credit: Urban Outfitters

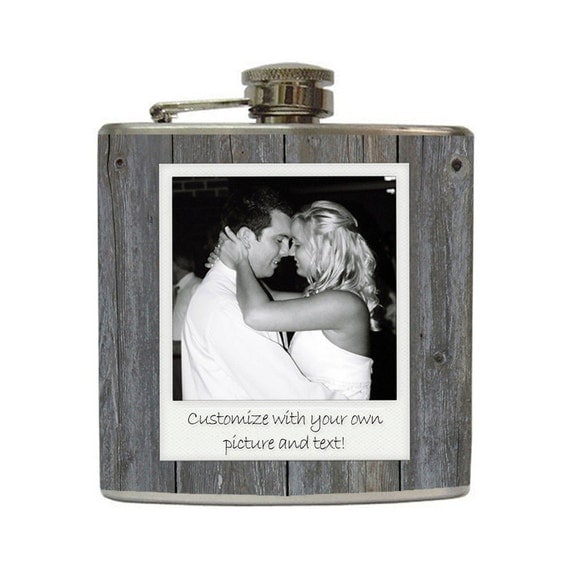
Idea #10 - Decopaged Flasks
And because it never hurts to have a emergency flask in your purse! 

Custom Polaroid Photo Flask Vintage Black and White Polaroid on Grey Barn Wood Stainless Steel 8 oz or 6 oz Liquor Hip Flask
Photo credit: LiquidCourage shop on Etsy

What did you gift your bridal party?  I'd love to hear your ideas!

Wednesday, January 25, 2012

Craft of the Week: Valentine's Day series #2


Today's Valentine's Day craft is a shadow box with little, printed paper hearts mounted inside.  I made mine for Nate and wanted to incorporate the lyrics to our "first dance" wedding song, but the possibilities for the paper hearts (and the recipient) are endless: newspaper saved from a special day (day you met, wedding day, anniversary, day your child was born), pages from a favorite book, colorful magazine pages, photos, a yearbook/playbill, etc.  And you can make this any size you want depending on your desired shadow box!

Supplies Needed:
  • Heart paper punch (available at any craft store)
  • Shadow box
  • Printed paper (for the hearts, your choice!)
  • Red card stock
  • White card stock
  • Tape
  • Glue Stick

Directions
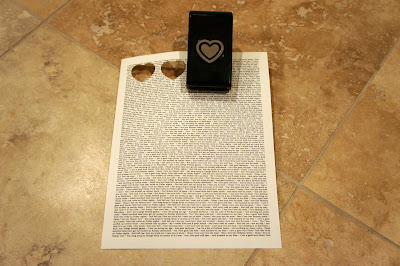
For the lyrics, I typed mine up in Microsoft Word. I played around with it a bit until I found the right font / size combo.  I ultimately chose Bookman Old Style, size 8, because I thought this font had a vintage flair, and the size was small enough that you'll be able to see multiple lines of the lyrics and still be able to read them once cut out into heart shapes.

To give the print outs a little hint of color and texture (and to avoid looking like I just pressed print on a white sheet of computer paper), I bought a sheet of specialty 8.5"x11" paper from A.C. Moore (Paper Treasures Raw Silk by the Paper Company 10901-063).  I would recommend choosing something along the lines of a textured scrapbook paper, but not card stock, as it wont bend as easily.  Save the card stock for the accent heart (I chose red!) and your background (white).

Once you have made or selected your print for the hearts, you're ready to craft!

1. Use your heart paper punch to cut out the paper hearts from your print.  I needed 15 total.  I also cut out one paper heart from my red card stock.


2. My shadow box came with a cardboard backing (no matte).  So, I used that as a base and cut down my white card stock to make a nice clean background.


3. Next comes the tricky part of measuring where each heart should go.  There is no easy way to do this, but I made little markings on the perimeter of my board to identify the centers.  I also put little markings in pencil where the center each heart should be.


4. Using your fingers, gently give your hearts "wings" by bending the sizes up.  Remember, this is DIY and they're not supposed to be identical, so it's ok if some of your hearts have "flappy-er" wings!  Do not crease!


5. Add a small piece of folded tape to the back of the heart and gently press down on your board until all hearts are placed.  The tape (vs. glue) will make them pop off the background.


6. Glue your red heart to the board!  I also added white stickers with our wedding date!

7. Pop into your shadow box and admire your finished product! 


P.S. If you're curious, our song was Eric Church's Love Your Love the Most.