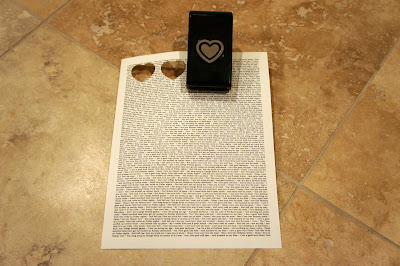
Today's Valentine's Day craft is a shadow box with little, printed paper hearts mounted inside. I made mine for Nate and wanted to incorporate the lyrics to our "first dance" wedding song, but the possibilities for the paper hearts (and the recipient) are endless: newspaper saved from a special day (day you met, wedding day, anniversary, day your child was born), pages from a favorite book, colorful magazine pages, photos, a yearbook/playbill, etc. And you can make this any size you want depending on your desired shadow box!
Supplies Needed:
- Heart paper punch (available at any craft store)
- Shadow box
- Printed paper (for the hearts, your choice!)
- Red card stock
- White card stock
- Tape
- Glue Stick
Directions
For the lyrics, I typed mine up in Microsoft Word. I played around with it a bit until I found the right font / size combo. I ultimately chose Bookman Old Style, size 8, because I thought this font had a vintage flair, and the size was small enough that you'll be able to see multiple lines of the lyrics and still be able to read them once cut out into heart shapes.
To give the print outs a little hint of color and texture (and to avoid looking like I just pressed print on a white sheet of computer paper), I bought a sheet of specialty 8.5"x11" paper from A.C. Moore (Paper Treasures Raw Silk by the Paper Company 10901-063). I would recommend choosing something along the lines of a textured scrapbook paper, but not card stock, as it wont bend as easily. Save the card stock for the accent heart (I chose red!) and your background (white).
Once you have made or selected your print for the hearts, you're ready to craft!
1. Use your heart paper punch to cut out the paper hearts from your print. I needed 15 total. I also cut out one paper heart from my red card stock.
2. My shadow box came with a cardboard backing (no matte). So, I used that as a base and cut down my white card stock to make a nice clean background.
3. Next comes the tricky part of measuring where each heart should go. There is no easy way to do this, but I made little markings on the perimeter of my board to identify the centers. I also put little markings in pencil where the center each heart should be.
4. Using your fingers, gently give your hearts "wings" by bending the sizes up. Remember, this is DIY and they're not supposed to be identical, so it's ok if some of your hearts have "flappy-er" wings! Do not crease!
5. Add a small piece of folded tape to the back of the heart and gently press down on your board until all hearts are placed. The tape (vs. glue) will make them pop off the background.
6. Glue your red heart to the board! I also added white stickers with our wedding date!
7. Pop into your shadow box and admire your finished product!
P.S. If you're curious, our song was Eric Church's Love Your Love the Most.


Love this idea!!
ReplyDelete