Showing posts with label craft of the week. Show all posts

Tuesday, May 29, 2012

Emily's a College Graduate!


On Saturday, my baby sister, Emily, graduated from college!  FROM COLLEGE! 

(Man, I feel old!)

And I was equally as impressed with her degree in Accounting as I was with her beautifully decorated graduation cap (above)!!  I mean, who else could transform a royal blue cap and gown into her own Lilly Pulitzer-inspired masterpiece?!  Only Emily!

I'm curious, did you decorate your cap when you graduated?  It made it so easy to spot her in the sea of royal blue graduates on her big day!  I think she should frame it next to her diploma as a memento!

P.S. One of Emily's roommate's also hand painted the flowers on a thank you sign that they hung on their house.  These sorority girls are quite creative, don't ya think?!


P.P.S. And a photo of my adorable niece, Emma (wearing her first Lilly dress!) just because she's so cute...

Tuesday, April 24, 2012

Craft of the Week: Lilly Pulitzer Bangle Bracelets


This past weekend, my sister and I crafted, not exactly together, but together from afar.  It's the best we could do when we're in need of a craft fix and can't get together!!

Anyways, I had seen an idea for mod podge bangle bracelets on Pinterest and knew right away we could use our (dwindling) stash of Lilly Pulitzer cocktail napkins to make our own!  You know how much I love a good mod podge craft...(here) and (here)...and any accessory with a great Lilly print!

For mine, I used a tan acrylic bangle that I had laying around from an URBN sample sale (basically for free) since I wasn't exactly sure how it'd turn out...and was feeling a bit lazy with all the Sunday rain.  Em went to JoAnns and bought a silver bangle for $4.  And I think that is the way to go - while mine turned out great, I love how hers has a shine to it from the underlying metal, and I think the darker surface made her napkin colors look even brighter!!

(Emily's bracelet is featured above; mine is below using leftover Floaters print napkins from Kathryn's bridal shower).

So yes, I will be heading to JoAnns and my local Lilly store (for my napkins, of course!) this weekend because I'm dying to make more!  I think I have a few girlfriends who I would like one of these beauties!

Supplies Needed:
  • Bangle bracelet
  • Lilly Pulizter cocktail napkin (only need 1 in your favorite print!)
  • Mod Podge
  • Foam Brush
  • Scissors 

Directions:
1. Napkins typically have two (or three) layers - one with the print/color, and one (or two) white layers for added absorbency.  For this craft, you only need the printed layer so the first step is carefully to peel apart the napkin. 


2. Cut the napkin into into 3/4" x 3" strips. 
  

3. Once you have about 10-12 pieces ready, paint a section of your bracelet with mod podge using your foam brush.  Then carefully place the napkin on top of the glue at a diagonal - this helps prevent folds and bubbles in the napkin as it dries to the curve of the bracelet.  Fold ends inside and cut. 
As you repeat, remember you want as little overlap as possible, as even the smallest overlap will be amplified in color once you add your glue.
4. I glued the napkin strips onto about 80% of the bracelet and then applied a top layer of mod podge. Then, I let it completely dry before doing the remaining section.

Monday, April 16, 2012

Craft of the Week: Glitter Shoes!


It's been a little while since my last Craft of the Week post.  (Like I said, I've been channeling my creativity in other ways lately...)  But today I thought I'd share one of my favorite "pre-blog" crafts! 

DIY Glitter Shoes!

With sequins and sparkles literally everywhere this past winter / holiday season, I was dying to use some glitter to jazz up something old in my closet.  And after a trip to DSW, I decided I could totally save myself the $60 and make my own glitter shoes with old black pumps.  So, I recruited my sister, Emily (who is my lovely hand model in the below pictures!) and to the craft store we went!

The shoes, while messy to make, actually turned out to be a major success!  Emily wore hers to her sorority's winter formal and I wore mine to my work holiday party.  They were a huge hit (which means a lot coming from talented fashion designers)!  Best part?  While we may have left a little trail of glitter throughout our respective parties, the glitter actually stayed on!  No big patches missing, just a few flakes here or there!  I can't wait to break them out again next year (that is, after I wear the heck out of my flip flips and sandals all summer)!

Anyways, here's the tutorial!  And apologies in advance for the over-exposed pictures! Ooops!

Supplies Needed:
  • Old leather shoes (work better than suede)
  • Craft Glitter (in any color / size)
  • Tacky Glue
  • Spray adhesive glue (we used Elmer's, but the stronger the better!)
  • Foam brush
  • Cardboard / poster board
  • Paper towels / tissue paper

Directions:
1. The key this craft is to add the glitter in sections..and be very liberal with both the glue and the glitter!  So first, a small area of the shoe with your foam brush and tacky glue.  Apply glitter - with hands or pouring from the bottle.


I'd highly recommend stuffing your shoes with paper towels / tissue paper to protect the insides from glue and glitter (especially in step 2).

If you accumulate excess glitter piles, we would occasionally funnel the leftover glitter back into the jar.  Like I said, be liberal when applying!

  
2. Once you've completed gluing/glittering the whole shoe, let it sit to dry for about 30 minutes.  Then, spray your shoes with the spray adhesive - keeping the spray about 6 inches above your shoe.  Leave out to dry for 24 hours before wearing!  (Store in a shoe box to prevent glitter from getting everywhere in your closet!)


Hmm, perhaps I need to spruce up a a pair or two of my summer sandals...!

Enjoy!

Tuesday, March 20, 2012

Craft of the Week: Photo Coasters


A while back in my post on Bridesmaid Gift Ideas, I suggested making each one of your maids (or friends, or parents, or your brand new niece you can't get enough of...) these adorable photo coasters.  And today, I'm finally giving ya'll the tutorial I promised!  It's easy, cheap and makes a cute homemade present - I put these ones in Nate's stocking!

Supplies Needed:
  • Scissors / Paper Cutter
  • Mod podge
  • Foam brush
  • 6 square tiles (from Home Depot, $0.16 each)
  • 6 4x6 photos (works much better if printed on actual photo paper vs. printer paper)
  • 24 felt glides

Directions:
1. Cut down your 4x6 photos into 4x4 squares.


2. Paint the back of the photo with mod podge and glue to the top of the tile. 


3. Once the glue has dried and the photos are firmly in place, paint a coat of mod podge on top of the pictures to give it a glossy finish.  Do not worry, it will dry clear!


4. Let your tiles completely dry....


5. Turn the tiles over and add the felt glides to the corners of each tile.


7. Eat, drink and be merry!  xoxo

P.S. Happy first day of spring!  Are you as excited as I am for free Rita's?!

Thursday, March 1, 2012

Craft of the Week: Mod Podge Lilly Pulitzer Picture Frame

My decoupaged Lilly Pulitzer Photo Frame
(with one of my favorite pictures of my mom and sisters)

Mod Podge is, in my opinion, is one of the easiest and most versatile glues to craft with.  It glues and seals to almost any surface (wood, plastic, paper, etc.) and it dries glossy and clear, making it the perfect finisher! 
 
The real deal: Mod Podge

My favorite type of craft using mod podge is called decoupage.  Decoupage is the art of decorating an object by gluing colored paper cutouts (or photos) onto it.  (Check out this post where I told ya'll about some of the decoupage crafts my mom and I used to do together!)

Anyways, back in November at the Lilly Pulitzer Warehouse sale (in King of Prussia, PA), my sisters and I each received a free Lilly Pulitzer photo frame for shopping the sale.  While they were adorable in their own (especially since they were free), the frames were just plain white - the opposite of what you think of when you hear Lilly Pulitzer!  So, my sister, Emily, and I decided we could jazz them up a bit with some mod podge these adorable Lilly Pulitzer cocktail napkins!


Supplied Needed:
  • Picture Frame
  • Cocktail Napkins
  • Mod Podge
  • Scissors
  • Foam Brush

Directions:
1. Napkins typically have two (or three) layers - one with the print/color, and one (or two) white layers for added absorbency.  For this craft, you only need the printed layer so the first step is carefully to peel apart the napkin. Do this to 3-4 cocktail napkins depending on how large your frame is (and how many napkins you you accidentally rip in the process).

2. The next step is to cut the napkins into sections that will fit each side or your frame, cutting 4 additional pieces for your corners.  The key in this particular craft (and this is not true for all decoupage) is that you want as little overlap as possible, as even the smallest overlap will be amplified in color once you add your glue.

3. Once you have your pieces ready, paint some Mod Podge with a foam brush directly onto your frame, one section at a time.  Then carefully place the napkin on top of the glue.

Emily is gluing her napkins one section at a time...

4. Once you have covered the whole frame, it should look something like this.  Now its time to let your frame dry for 20-30 minutes.
 
My frame is drying...

5. Now its time to carefully paint on a top coat of mod podge, to give your napkins a protective finish and your frame a glossy coat.  I recommend doing the back first, letting that dry, and then doing the front and sides.

6. After your frame is completely dry, pop in your favorite photo and voila!  You have your very own Lilly Pulitzer picture frame!

Thursday, February 23, 2012

Craft of the Week: Leftovers

What's a girl to do with leftover craft supplies?  Here are a few fun ideas...

Valentine's Day Series # 1 - Scrabble Love
Have your own photo shoot...


Or make some creative drink coasters...


Craft of the Week: Chalkboard Wine Glasses
Make your own chalkboard coasters....

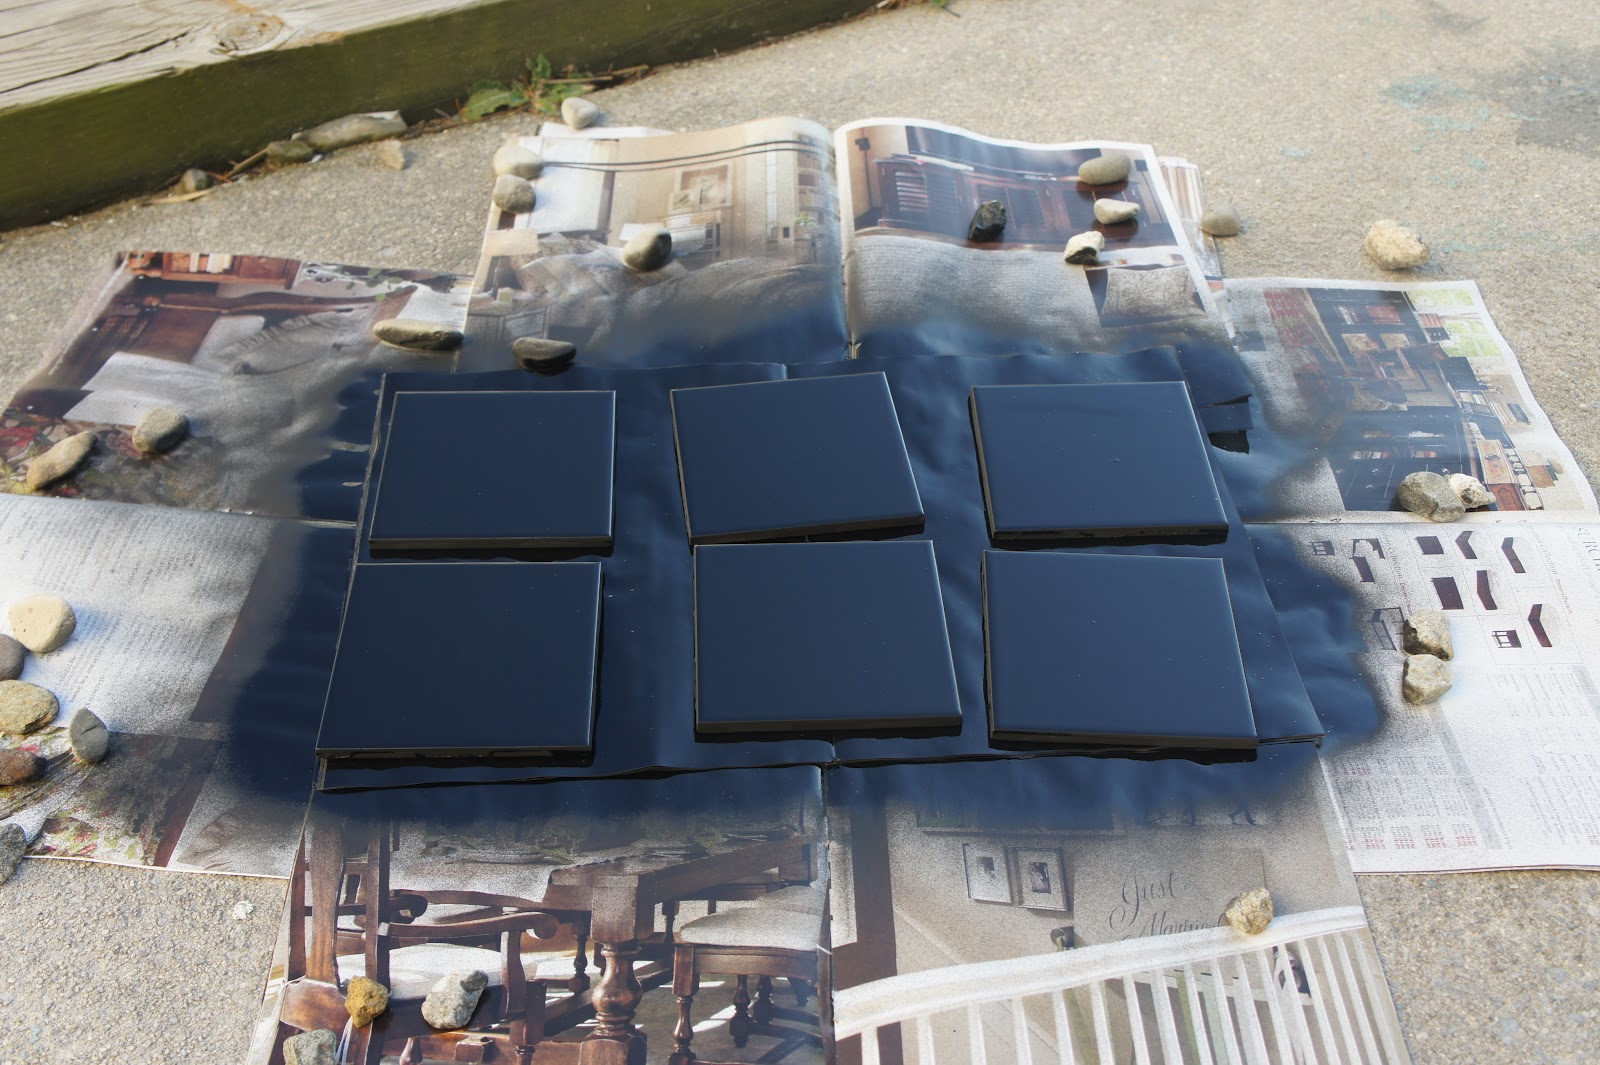
Spray paint + ceramic tiles

(Instead of buying some here)

Or a chalkboard serving platter...

Tutorial here

Valentine's Day Series #2: Printed Paper Heart Shadow Box
Make this adorable paper banner...

Tutorial here

Valentine's Day Series #4: Hearts & Maps
Frame a favorite photo with a map as your matte....

via Pinterest

Monday, February 13, 2012

Craft of the Week: Valentine's Day Series #4

The idea for the fourth installment of our Valentine's Day craft series actually came from something my sister, Emily, saw on a blog. 

Pinned Image

We met.  We married.  We Live.

I've actually seen a lot DIY projects lately that use maps - a photo from a vacation/life event framed with a map as the matte, huge old maps as instant artwork, etc. - and thought the hearts in this one tied nicely with our V-day theme.

What I didn't realize is how tricky it would be to find good maps!

First, I tried the internet...but all of the free printable maps I found looked too much like an iphone / google map...not really the feel I was looking for.  (BTW if anyone knows of a great site to use I'd be forever grateful...and also a little annoyed that I couldn't find it myself!)

Then, I decided to hit up the public library to photocopy an atlas.  Of course, I totally forgot that you can't check out an atlas...so I had to run home to get some pretty card stock.  Do you know how hard it is to find a color copier in a library?!!  Maddening! 

Anyways, there had to of been an easier way...definitely think I was off my game...but whatever, I have my maps!  (And I guess I know what I'll be looking for at the spring garage sales...an old atlas)

OK now that you've heard my sob story (I hope it doesn't deter you from trying this one out!)...onto the directions!

Supplies needed:
  • 3 maps of desired locations
  • Heart shape (to trace your hearts) - the cheapest thing I found was a box of heart shaped chocolates for $0.50 from CVS!
  • Frame(s) - I decided to use 3 4"x4" frames instead of one three-picture fame (see above), as they were on sale for $4 each!
  • Good handwriting (or computer) to make your labels
  • Card stock for your "matte" - I chose pink!
  • Glue stick
  • Scissors
  • Tacky Glue
  • Foam Brush

Directions:
1. Trace and cut out hearts from your maps!  I decided to do these three:
We fell in love - New York City
We married - Philadelphia
We live - Ocean City, NJ


2. To add some color, I decided to make a pink "matte" to go behind each heart.  I did this by tracing the glass on pretty pink card stock.


3. With your glue stick, glue the hearts to the center of the card stock.  Pop into the frame.

4. I made labels with leftover card stock from this craft.  Using the foam brush, I lightly glued of my each labels to the bottom of the frames.  Alternatively, your labels can go inside the frame (as picture above).


5. Hang up your frames and admire your finished product!  Pretty cute, right?

we fell in love.  we married. we live.

And now, my friends, we've reached the end of our four part Valentine craft series! I love to know which one was your favorite!

xoxo

Wednesday, February 1, 2012

Craft of the Week: Valentine's Day series #3

A few months ago, I "pinned" (on Pinterest) a white canvas board with a lovely little quote in white block letters. 

Pinned Image

How sweet, right?  I definitely could make that, I thought.  I love the idea of turning quotes into artwork for your house!!

So I "clicked through" to find the originating site and was linked to Not on the High Street, a handmade goods site similar to Etsy.  That's when my mind was blown.  This little thing was selling for a whopping 195 pounds!!  Pounds!!!?  That's $307!!!!!  Plus shipping!

Insane.

So, today's Valentine's Day craft is a DIY version of this overpriced wall art, for 1/10th the cost and all the loveliness!  And, you pick your quote!

Supplies Needed:
  • Canvas - I purchased a 12"x12" board from A.C. Moore on sale for $10
  • Wood Letters - I actually tried a few craft stores before finding the right size and availability of letters (I liked these 1" letters because it reminded me of my handwriting...in all caps)
  • Tacky Glue
  • Foam Brush
  • White Spray Paint

Directions:
1. Spray paint the front of your letters.  (oops - looks like we're going to have a few white rocks, too)


Can you guess what my quote is?  I originally wanted "I have always known it was you" but they were sold out of H's!


2. To avoid your letters sticking to the paper, make sure you move them around gently before they dry completely....or use wax paper!


3. When your letters are completely dry, repeat steps 1-2 to spray paint the back of your letters.  Use a new piece of newspaper / wax paper!

4. Not it's time to arrange the letters on you board.  Using a 12" board, 1" letters, and 5 rows, the math was pretty easy.


6.  Next, I used a foam brush to paint tacky glue on the back of each letter before gently pressing on the canvas.  I started with the first letter of each row, 1" apart.   Then I placed my ruler in between each line of the quote and spaced the center of the letters 1" apart. 

7. Spray paint your entire board and set out to dry.  Be careful not to use too much paint - you do not want to get pools!!  A light coat is fine!  (Sorry no pictures of this step...it was dark outside by the time I got to this step!)

Final product (sitting on my shelf at work!):

Wednesday, January 25, 2012

Craft of the Week: Valentine's Day series #2


Today's Valentine's Day craft is a shadow box with little, printed paper hearts mounted inside.  I made mine for Nate and wanted to incorporate the lyrics to our "first dance" wedding song, but the possibilities for the paper hearts (and the recipient) are endless: newspaper saved from a special day (day you met, wedding day, anniversary, day your child was born), pages from a favorite book, colorful magazine pages, photos, a yearbook/playbill, etc.  And you can make this any size you want depending on your desired shadow box!

Supplies Needed:
  • Heart paper punch (available at any craft store)
  • Shadow box
  • Printed paper (for the hearts, your choice!)
  • Red card stock
  • White card stock
  • Tape
  • Glue Stick

Directions
For the lyrics, I typed mine up in Microsoft Word. I played around with it a bit until I found the right font / size combo.  I ultimately chose Bookman Old Style, size 8, because I thought this font had a vintage flair, and the size was small enough that you'll be able to see multiple lines of the lyrics and still be able to read them once cut out into heart shapes.

To give the print outs a little hint of color and texture (and to avoid looking like I just pressed print on a white sheet of computer paper), I bought a sheet of specialty 8.5"x11" paper from A.C. Moore (Paper Treasures Raw Silk by the Paper Company 10901-063).  I would recommend choosing something along the lines of a textured scrapbook paper, but not card stock, as it wont bend as easily.  Save the card stock for the accent heart (I chose red!) and your background (white).

Once you have made or selected your print for the hearts, you're ready to craft!

1. Use your heart paper punch to cut out the paper hearts from your print.  I needed 15 total.  I also cut out one paper heart from my red card stock.


2. My shadow box came with a cardboard backing (no matte).  So, I used that as a base and cut down my white card stock to make a nice clean background.


3. Next comes the tricky part of measuring where each heart should go.  There is no easy way to do this, but I made little markings on the perimeter of my board to identify the centers.  I also put little markings in pencil where the center each heart should be.


4. Using your fingers, gently give your hearts "wings" by bending the sizes up.  Remember, this is DIY and they're not supposed to be identical, so it's ok if some of your hearts have "flappy-er" wings!  Do not crease!


5. Add a small piece of folded tape to the back of the heart and gently press down on your board until all hearts are placed.  The tape (vs. glue) will make them pop off the background.


6. Glue your red heart to the board!  I also added white stickers with our wedding date!

7. Pop into your shadow box and admire your finished product! 


P.S. If you're curious, our song was Eric Church's Love Your Love the Most.