Showing posts with label Valentine's Day. Show all posts

Thursday, February 23, 2012

Craft of the Week: Leftovers

What's a girl to do with leftover craft supplies?  Here are a few fun ideas...

Valentine's Day Series # 1 - Scrabble Love
Have your own photo shoot...


Or make some creative drink coasters...


Craft of the Week: Chalkboard Wine Glasses
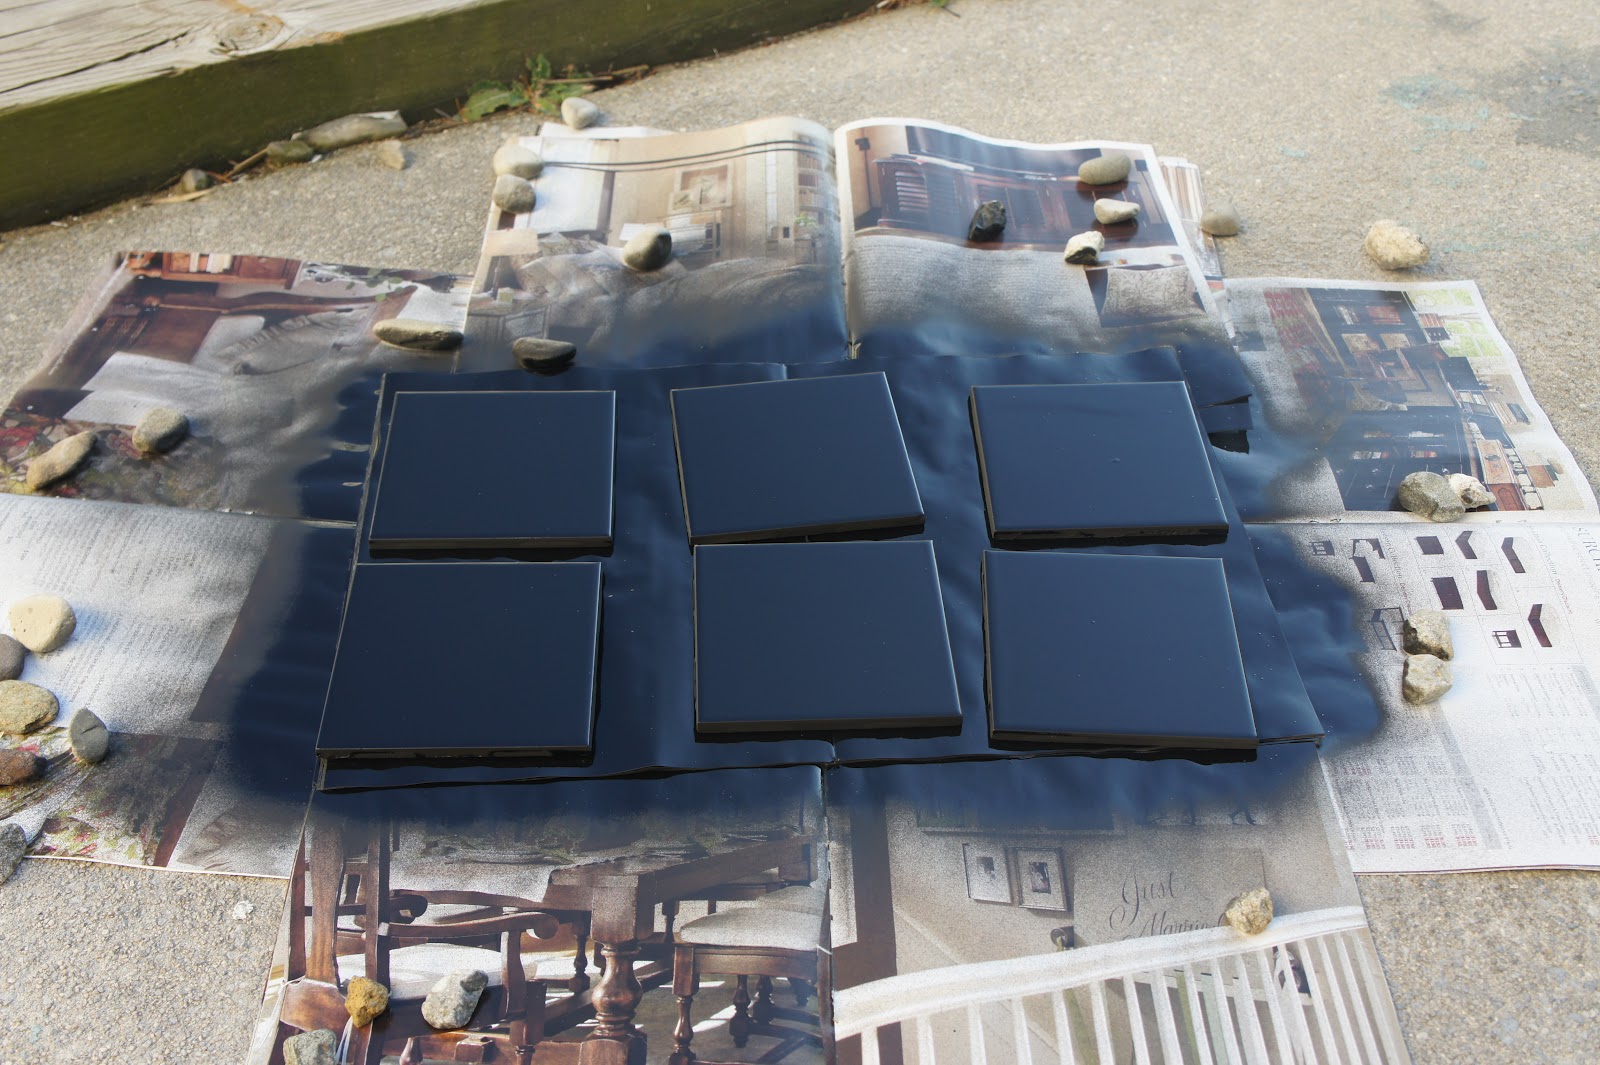
Make your own chalkboard coasters....

Spray paint + ceramic tiles

(Instead of buying some here)

Or a chalkboard serving platter...

Tutorial here

Valentine's Day Series #2: Printed Paper Heart Shadow Box
Make this adorable paper banner...

Tutorial here

Valentine's Day Series #4: Hearts & Maps
Frame a favorite photo with a map as your matte....

via Pinterest

Tuesday, February 14, 2012

Happy Valentine's Day


Happy Valentine's day, loves!  No matter how you're celebrating, I hope all of you have a day filled with lots of love and laughter (wink*) and of course, chocolates!! 

I'm feeling a bit nostalgic today, so I thought I'd share with you some of my memories Valentine's day growing up... 

When I was a kid, there was nothing more I looked forward to on Valentine's day than dinner with my family.  Every year, my dad gave would go to a special candy shop and fill a small red heart box for each kid with an assortment of our favorite candies.  My mom would put them out at our assigned seats at the dinner table and there was never a more beautiful sight than those pretty red boxes wrapped in cellophane staring us down during dinner.  My mom would give my dad, and my dad would give my mom, a larger version of the heart box.  I remember being sooo excited at the thought of one day getting the big heart box from my own husband!  (Ooohh the little important things in the eyes of a child!)  But until then, I felt pretty special that my daddy was my valentine just like he was my mommy's.

My dad also always, always gave my mom jewelry - he loved giving her jewelry.  And even though dark chocolate nonpareils trumped a necklace any day in my book (then, not now of course),  it was a gesture that was amazingly reassuring to me as a kid to see my dad give my mom such beautiful things - it was a visible sign how much my parents loved each other (because as kids, you don't see all the little, less obvious acts of love they did for each other each and every day).  Still and always will be, in my eyes, so romantic!

As we ate our candies for dessert, my mom would tell us the story about how she once as a kid ate some of the jordan almond candies from her sister, Kathi's, valentine box.  When Kathi told on her...she was sent to her room and was so upset she that she secretly bit the blinds (so that they would have teeth marks) on Kathi's side of the room. This story made me love my mom even more because I always thought she was such a rule follower - it was funny to hear that even she got in trouble as a kid!

What I'd do to hear that story one more time... <3 

One of my funniest memories is when in the 2nd grade a certain boy chased me around the playground trying to give me a Valentine's day card that I refused to accept (because boys were gross, of course!)!  He finally stopped when I told the lunch aid that he was bothering me...and he subsequently went back to his desk, erased my name and gave the card to another girl!  They went on to "date" the majority of elementary school!  Ahh how fickle is love even at 7-8 years old...

My first real Valentine was my 6th grade boyfriend.  I remember how excited I was to have a boyfriend on this glorious (well of course I thought it was glorious then...I had a boyfriend!) holiday!  He gave me a gold necklace with two interlocking hearts and a single rose.  I think I gave him heart boxers (a suggestion from my mom) and Abercrombie woods cologne (because that's what all the hot guys wore back then, right?!)  Side note: I actually was his date to his senior prom in high school...and I wore the heart necklace!

High school Valentine's days actually make me laugh to think about.  I went to an all girls high school where it was literally every girls dream to have their boyfriend send them flowers at school.  So much so, that I swear some girls sent themselves flowers so they wouldn't feel left out.  The front office literally looked like a florist with the hundreds (i kid you not) hundreds of flower arrangements.  It actually was quite comical!

Did anyone else ever have to observe "the breakup window?"  You know, when you're dating someone and in your mind its over...but you can't break up with him too close before or after said holiday?  I did, once...I remember feeling so guilty about him taking me out to a fancy Italian dinner!  And cringing at the flowers he sent.  Luckily, we were broken up by St. Patrick's day!

Besides the ones I've spent with Nate - our first one he took me out to a big fancy dinner in New York and the next morning, cooked me heart shaped pancakes for breakfast (cue: aww!) - I actually don't have many other real memorable memories of Valentine's days past.  I don't remember the ones I was single for, or the ones I was casually or seriously dating another guy.  And thankfully I don't have any horror stories (although I kinda wish I did because those are always fun to tell)!  Because to be honest, in the scheme of things, they didn't matter...

(I guess I can say that much more confidently now, as I am sharing my first married Valentine's day with my soul mate!  I love you, Natey!)

Anyways, Nate and I actually are planning to spend our first married Valentine's Day just like any other Tuesday night...except with a better than usual dinner: lobster (ravioli's), wine, cheese and chocolates!  And I wouldn't have it any other way! 

Ironically, I will be making Rachel Ray's "You Won't Be Single For Long Vodka Cream Sauce" for the ravioli's - which is the best and worst thing I've ever made Nate according to the Newlywed-esque game we played at my Bridal Shower.  My mom taught me how to make it the summer after college, right before I moved to New York and started dating Nate.  And I guess, it worked!

(BTW I highly recommend trying out this recipe...you won't be disappointed!)

I'm curious, what are your favorite Valentine's day memories?  I'd love to hear some stories...

xoxo

P.S. A big hug and kiss to all my faithful readers out there!  Thank you all for your love and support in reading, following, pinning and commenting on my blog!  You guys are the best! 

P.P.S. How cute is that google video?

Monday, February 13, 2012

Craft of the Week: Valentine's Day Series #4

The idea for the fourth installment of our Valentine's Day craft series actually came from something my sister, Emily, saw on a blog. 

Pinned Image

We met.  We married.  We Live.

I've actually seen a lot DIY projects lately that use maps - a photo from a vacation/life event framed with a map as the matte, huge old maps as instant artwork, etc. - and thought the hearts in this one tied nicely with our V-day theme.

What I didn't realize is how tricky it would be to find good maps!

First, I tried the internet...but all of the free printable maps I found looked too much like an iphone / google map...not really the feel I was looking for.  (BTW if anyone knows of a great site to use I'd be forever grateful...and also a little annoyed that I couldn't find it myself!)

Then, I decided to hit up the public library to photocopy an atlas.  Of course, I totally forgot that you can't check out an atlas...so I had to run home to get some pretty card stock.  Do you know how hard it is to find a color copier in a library?!!  Maddening! 

Anyways, there had to of been an easier way...definitely think I was off my game...but whatever, I have my maps!  (And I guess I know what I'll be looking for at the spring garage sales...an old atlas)

OK now that you've heard my sob story (I hope it doesn't deter you from trying this one out!)...onto the directions!

Supplies needed:
  • 3 maps of desired locations
  • Heart shape (to trace your hearts) - the cheapest thing I found was a box of heart shaped chocolates for $0.50 from CVS!
  • Frame(s) - I decided to use 3 4"x4" frames instead of one three-picture fame (see above), as they were on sale for $4 each!
  • Good handwriting (or computer) to make your labels
  • Card stock for your "matte" - I chose pink!
  • Glue stick
  • Scissors
  • Tacky Glue
  • Foam Brush

Directions:
1. Trace and cut out hearts from your maps!  I decided to do these three:
We fell in love - New York City
We married - Philadelphia
We live - Ocean City, NJ


2. To add some color, I decided to make a pink "matte" to go behind each heart.  I did this by tracing the glass on pretty pink card stock.


3. With your glue stick, glue the hearts to the center of the card stock.  Pop into the frame.

4. I made labels with leftover card stock from this craft.  Using the foam brush, I lightly glued of my each labels to the bottom of the frames.  Alternatively, your labels can go inside the frame (as picture above).


5. Hang up your frames and admire your finished product!  Pretty cute, right?

we fell in love.  we married. we live.

And now, my friends, we've reached the end of our four part Valentine craft series! I love to know which one was your favorite!

xoxo

Tuesday, February 7, 2012

Will You be My Valentine?

I just looked at my calendar, and Valentine's Day is exactly one week away!  Crazy!  How is it already almost mid-February?!

Nate and I aren't really big into Valentine's day (although I admit, I do secretly dream of him one day surprising me with anything out of a movie...just like every other girl: rose petals scattered all over the floor/bed, whisking me off on a romantic weekend getaway, amazing jewelry, over the top flowers at my place of employment...hint hint).  But we definitely are card people - cards, and the thought behind them, are so special!

However, buying the perfect Valentine's day card is a task I usually dread - I'm either at the store a day too late and all they have left is "happy valentine's day, aunt" cards (who sends their aunts v-day cards, anyways?!  Don't get me wrong, I love my aunts...but don't need a made up holiday to show it! :) OR I can't find anything that doesn't scream out cheesy, commercial or juvenile!! 

This year, I'm a little more excited...as it's my first year shopping in the "husband" section...but I still don't thinks my experience is going to be any different! So, I've decided I'm doing my shopping online (which is my preferred method of shopping) and I spent some time mining the Internet to find some sweet options to share with all of you. 
Eskimo Kiss card


Martha Stewart Clip Art cards


Yarn Heart Bow card


XOXO card

 you're my lobster card
You're My Lobster card

Have you started looking for the perfect card for your Valentine?  Where do you typically buy yours?

P.S. These watercolor cards would be cute to give to your lovey throughout the day - one on his pillow, one in his car, etc.!  Brownie points because they are free! :)

P.P.S. Perhaps I'll send these cards to our family members...because I do miss and love them...

Wednesday, February 1, 2012

Craft of the Week: Valentine's Day series #3

A few months ago, I "pinned" (on Pinterest) a white canvas board with a lovely little quote in white block letters. 

Pinned Image

How sweet, right?  I definitely could make that, I thought.  I love the idea of turning quotes into artwork for your house!!

So I "clicked through" to find the originating site and was linked to Not on the High Street, a handmade goods site similar to Etsy.  That's when my mind was blown.  This little thing was selling for a whopping 195 pounds!!  Pounds!!!?  That's $307!!!!!  Plus shipping!

Insane.

So, today's Valentine's Day craft is a DIY version of this overpriced wall art, for 1/10th the cost and all the loveliness!  And, you pick your quote!

Supplies Needed:
  • Canvas - I purchased a 12"x12" board from A.C. Moore on sale for $10
  • Wood Letters - I actually tried a few craft stores before finding the right size and availability of letters (I liked these 1" letters because it reminded me of my handwriting...in all caps)
  • Tacky Glue
  • Foam Brush
  • White Spray Paint

Directions:
1. Spray paint the front of your letters.  (oops - looks like we're going to have a few white rocks, too)


Can you guess what my quote is?  I originally wanted "I have always known it was you" but they were sold out of H's!


2. To avoid your letters sticking to the paper, make sure you move them around gently before they dry completely....or use wax paper!


3. When your letters are completely dry, repeat steps 1-2 to spray paint the back of your letters.  Use a new piece of newspaper / wax paper!

4. Not it's time to arrange the letters on you board.  Using a 12" board, 1" letters, and 5 rows, the math was pretty easy.


6.  Next, I used a foam brush to paint tacky glue on the back of each letter before gently pressing on the canvas.  I started with the first letter of each row, 1" apart.   Then I placed my ruler in between each line of the quote and spaced the center of the letters 1" apart. 

7. Spray paint your entire board and set out to dry.  Be careful not to use too much paint - you do not want to get pools!!  A light coat is fine!  (Sorry no pictures of this step...it was dark outside by the time I got to this step!)

Final product (sitting on my shelf at work!):

Wednesday, January 25, 2012

Craft of the Week: Valentine's Day series #2


Today's Valentine's Day craft is a shadow box with little, printed paper hearts mounted inside.  I made mine for Nate and wanted to incorporate the lyrics to our "first dance" wedding song, but the possibilities for the paper hearts (and the recipient) are endless: newspaper saved from a special day (day you met, wedding day, anniversary, day your child was born), pages from a favorite book, colorful magazine pages, photos, a yearbook/playbill, etc.  And you can make this any size you want depending on your desired shadow box!

Supplies Needed:
  • Heart paper punch (available at any craft store)
  • Shadow box
  • Printed paper (for the hearts, your choice!)
  • Red card stock
  • White card stock
  • Tape
  • Glue Stick

Directions
For the lyrics, I typed mine up in Microsoft Word. I played around with it a bit until I found the right font / size combo.  I ultimately chose Bookman Old Style, size 8, because I thought this font had a vintage flair, and the size was small enough that you'll be able to see multiple lines of the lyrics and still be able to read them once cut out into heart shapes.

To give the print outs a little hint of color and texture (and to avoid looking like I just pressed print on a white sheet of computer paper), I bought a sheet of specialty 8.5"x11" paper from A.C. Moore (Paper Treasures Raw Silk by the Paper Company 10901-063).  I would recommend choosing something along the lines of a textured scrapbook paper, but not card stock, as it wont bend as easily.  Save the card stock for the accent heart (I chose red!) and your background (white).

Once you have made or selected your print for the hearts, you're ready to craft!

1. Use your heart paper punch to cut out the paper hearts from your print.  I needed 15 total.  I also cut out one paper heart from my red card stock.


2. My shadow box came with a cardboard backing (no matte).  So, I used that as a base and cut down my white card stock to make a nice clean background.


3. Next comes the tricky part of measuring where each heart should go.  There is no easy way to do this, but I made little markings on the perimeter of my board to identify the centers.  I also put little markings in pencil where the center each heart should be.


4. Using your fingers, gently give your hearts "wings" by bending the sizes up.  Remember, this is DIY and they're not supposed to be identical, so it's ok if some of your hearts have "flappy-er" wings!  Do not crease!


5. Add a small piece of folded tape to the back of the heart and gently press down on your board until all hearts are placed.  The tape (vs. glue) will make them pop off the background.


6. Glue your red heart to the board!  I also added white stickers with our wedding date!

7. Pop into your shadow box and admire your finished product! 


P.S. If you're curious, our song was Eric Church's Love Your Love the Most.

Friday, January 20, 2012

Craft of the Week: Valentine's Day series #1

If you know me, you know there is nothing I hate more than tacky holiday trinkets and decorations (especially of the Halloween and Christmas variety...and we'll throw Valentine's Day in there as well because I don't love the color red). 

But you also know that I lovvvvvvve homemade gifts...both giving and receiving! 

So this week I thought I would launch a 4 part "Craft of the Week" series of cute and creative Valentine's Day crafts to bring a little love to your home or to give to a loved one!!  Nothing tacky here, I promise!

Part 1- Scrabble L-O-V-E


Nate and I have been busy cleaning out our house and putting away some things in storage to de-clutter our living space and randomly, I found an old game of Scrabble in the garage.  I knew at once I could use the letters to make cute personalized gifts!  Perhaps in a frame?  So I went to the craft store in search of a small shadow box and happened to find one on sale for $7 that was filled with sea shells.  Worked for me!

Supplies Needed:
  • Scrabble letters
  • Shadow box (the length of your message will determine how large or small you should buy your box; mine is 5.5"x 5.5" matted to 4"x4")
  • Hot glue gun
  • Card stock
  • Tape
  • Paper Cutter
  • Paint (if desired)

Directions:
1. First, if you're going for a certain color scheme, now is the time to paint your frame.  So, disassemble the shadow box (save those sea shells! they will be great for another craft!).  But, I liked the white and sand colors as it went well with the colors in our house so I kept it as is.  I'd imagine a nice pale pink would look cute and a little more girly, or a black frame might play well with the color of the letters.

2. Cut down your card stock to match the size of the matting or inside of the frame.


3. Place two pieces of small tape on the back of the matting.  Tape the card stock to the back.


4. Next, spell out your message with the Scrabble letters however you want them placed.  I measured to find my exact centers and then eyeballed the tile placement.


5. Hot glue each letter to the card stock one at a time.


6. Pop into your fame!

The great part about this craft if that you can create any color scheme or message, making it as good of a Valentine as it does a housewarming or baby shower gift!  Or maybe to give to your Words With Friends enemy friend?

Engagement present?

Baby Shower present?